The short answer
The Brother SE700 - for soft caps, beanies and patches. For stiff, structured caps, no cheap machine does it properly.
Most hat searches assume one question - which machine does hats - when there are really two. Can it put a design on a soft cap or a beanie? Almost any embroidery machine can, using a method that never hoops the hat at all. Can it stitch the front of a stiff, structured baseball cap? On this site, only a multi-needle machine with a published cap frame can, and that is a completely different price bracket.
Brother publishes a 4 x 4 in field, 135 designs and over 103 sewing stitches for the SE700. The field is larger than the stitchable area on a typical cap front, and because it also sews, it can attach a patch to the structured caps it cannot stitch directly. That combination is why it is the cheapest honest answer.
How we judged this, before naming a machine
Hat work on a budget turns the site’s usual criteria upside down. Four things decide it, in this order.
1. What kind of hat - which decides whether a cheap machine can do it at all
Soft, unstructured caps - dad caps, washed cotton caps, bucket hats - have no stiff lining behind the front panel. They flatten. OESD’s cap tutorial is blunt about it: “the more structured the hat is, the more difficult it will be to embroider. Choose soft, unstructured caps for the best results.” BERNINA’s WeAllSew tutorial says the same: an unstructured cap “has no support material, it is not stiff and has more flexibility.”
Knit beanies are soft and unstructured too, so the same reasoning applies - with the caveat that knit stretches, which changes the backing you need (below).
Structured caps - the stiff six-panel baseball cap with a buckram-backed front - are the problem. The front curves in two directions and will not lie flat. That is what a cylindrical cap frame exists for, and it is the one capability no budget machine on this site publishes.
2. Field size - which is almost irrelevant here
The stitchable area on a cap front is small. The example in OESD’s tutorial measured roughly 3½ in wide by 2½ in tall - about 9 square inches. A 4 x 4 in field gives you 16. So the field-size argument that decides every other page on this site does not push you up a tier for hats, and paying for a bigger field to stitch cap fronts is paying for nothing.
3. Whether the machine sews
This matters more for hats than for almost anything else, because the budget route for a structured cap is not to stitch the cap. It is to embroider a patch and put the patch on the cap. A machine that also sews can attach that patch; an embroidery-only machine needs a second machine, hand-stitching or an iron-on backing.
4. Published speed - which only matters if hats are volume
One cap for a gift, and speed is irrelevant. Twenty caps for a team, and it matters, because on a single-needle machine you are also re-threading for every color on every cap.
The method that lets a cheap machine do soft caps
The trick is that you never hoop the hat. From OESD’s tutorial: “Instead of hooping the cap itself, you will hoop a stabilizer and then attach the cap to it.” In practice:
- Hoop a sticky, paper-backed stabilizer on its own, paper side up.
- Score and peel the paper to expose the adhesive.
- Flatten the cap front as far as it will go and press it onto the sticky stabilizer, lining up the center of the cap with the center of the hoop.
- Measure only the area you can actually press flat - OESD’s advice - and size the design to fit inside it.
- Stitch the design from the bottom up, starting nearest the brim, which is the order the WeAllSew tutorial recommends for caps.
This works on any machine with a hoop large enough for the stabilizer, which is every machine on this page. It works well on soft caps and poorly on stiff ones - which is exactly the line the two tutorials draw.
The machines, on published numbers
Hat-relevant specifications from each maker's product page| Machine | Field | Sews? | Speed | Cap frame published | Hat work it covers |
|---|
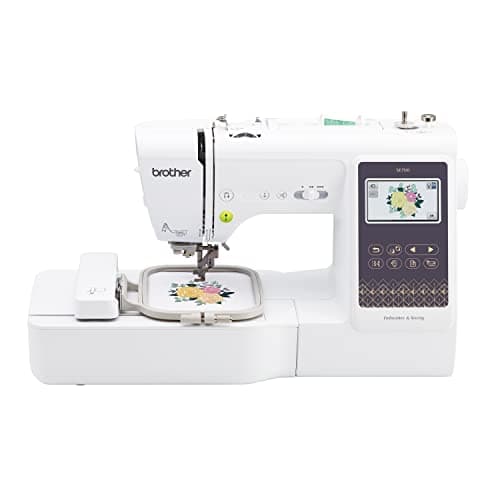
| Brother SE700 | 4 x 4 in | Yes | Not published | No | Soft caps, beanies, patches for structured caps |
|---|
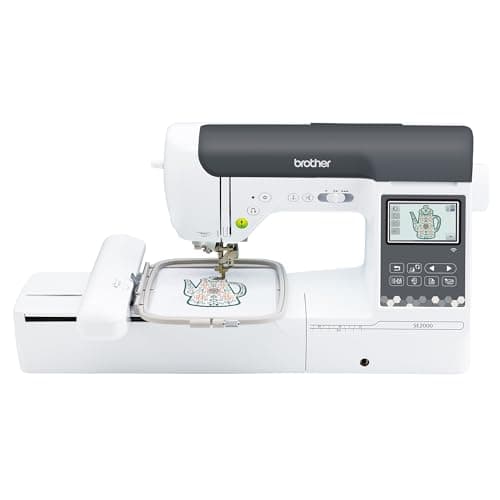
| Brother SE2000 | 5 x 7 in | Yes | 650 spm | No | As above, plus several patches per hooping |
|---|
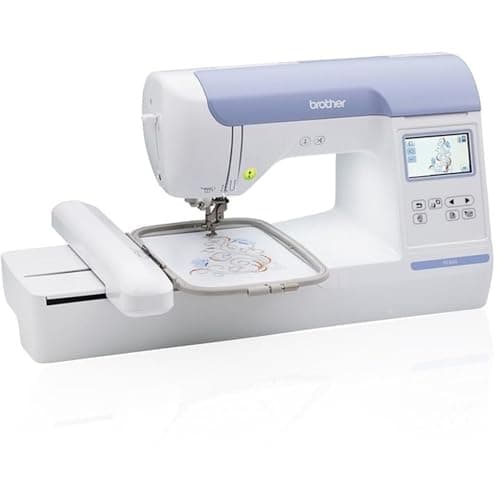
| Brother PE800 | 5 x 7 in | No | Not published | No | Soft caps, beanies, patches (attached separately) |
|---|
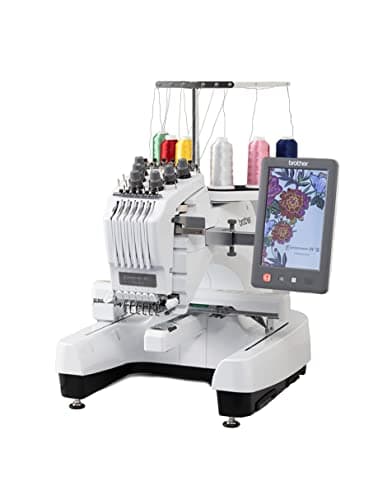
| Brother PR680W | 12 x 8 in | No | Up to 1,000 spm | Yes | Structured caps directly, plus everything above |
|---|
Why a patch is the cheap route to a structured cap
A structured cap front cannot be stitched properly without a cap frame, and on this site the only machine publishing that capability is the PR680W - a machine priced many times higher than every other machine on this page.
A patch, by contrast, is stitched flat. A 3 in patch needs about 9 square inches, which fits a 4 x 4 in field with room to spare. Stitch the patch flat, cut it out, and attach it to the structured cap.
You give up the look of embroidery stitched directly into the crown. You keep the entry-tier price. For a handful of caps that is almost always the right trade - and the patch roundup covers backing, borders and density in detail.
Why each machine placed where it did
1. Brother SE700 - the cheapest machine that genuinely does hat work
A 4 x 4 in field covers a cap front and a small patch, it sews so it can attach patches itself, and it is the least money you can spend on a machine that does both jobs. For soft caps, beanies and the occasional patched structured cap, nothing above it does the job materially better.
The honest drawback: Brother publishes no embroidery speed for it, so a batch of caps is unplannable. One patch per hooping. And it is not on Brother’s published compatibility list for the 4 x 7 in magnetic frame - which matters less for floated hats than for towels, but limits you later. If you keep embroidering, the 4 x 4 in ceiling is the thing you replace the machine over.
2. Brother SE2000 - the one to buy if hats are regular work
5 x 7 in, 650 spm embroidery and 850 spm sewing both published, 241 stitches and wireless transfer. The published speed lets you plan a batch, and the larger field lets you lay out several patches on one piece of backing and stitch them in a single run - which is where the patch route stops being slow.
The honest drawback: the extra field buys nothing on a single cap front, which is smaller than the entry machine’s field already. You are paying for batching, the published numbers and the workflow. It still cannot stitch a structured cap directly, and every color change is still manual.
3. Brother PE800 - the cheapest 5 x 7 in, if you already sew
Brother publishes 5 x 7 in, 138 designs and 11 fonts. No sewing head, which is why it costs less than a combination machine at the same field. If you already own a sewing machine to attach patches with, it is the better-value batching machine.
The honest drawback: it does not sew, so a patched cap needs your other machine, hand-stitching or an iron-on backing. Brother publishes no speed figure. And a monochrome 3.2 x 1.8 in screen makes positioning a small cap design fiddly.
4. Brother PR680W - the only way to stitch a structured cap properly
Brother publishes cap frame capability, six needles, a 12 x 8 in field and up to 1,000 stitches per minute. A structured cap goes on a cylindrical frame and is stitched directly, in six colors, without you re-threading.
The honest drawback: it is not a budget machine in any sense - it is on this page because anyone searching for a cheap hat machine deserves to know where the real cap capability starts, and what it costs to get there. It does not sew, the cap frame is a separate purchase, and the footprint is commercial. If structured caps are a business rather than a project, the full case is on the hat machine roundup.
Backing, which matters more than the machine
Soft cotton caps: a sticky tear-away, as in both tutorials above.
Knit beanies: knit stretches in every direction, so a design stitched into it without permanent support distorts. Use a cutaway, which stays in the hat - the same reasoning set out for knit shirts on the shirt roundup.
Patches: heavy cutaway or a purpose-made patch backing, stitched flat and attached afterward.
Skip this
Skip the budget tier if structured caps are the whole plan
If the hats people want from you are stiff, structured baseball caps with embroidery stitched directly into the front - team caps, logo caps, anything sold as a finished branded cap - no machine on this page except the PR680W does that properly, and patches are a substitute rather than the same product.
In that case, cost out the multi-needle tier honestly before buying a cheap machine you will replace. The arithmetic on when needles and a cap frame pay for themselves is on the small business roundup.
Choosing in three questions
Are your hats soft or structured? Soft caps and beanies: any machine here, and the SE700 is enough. Structured caps stitched directly: the PR680W, and nothing cheaper.
Would a patch do? If yes, a structured cap is back within budget - stitch flat, attach afterward. A machine that also sews makes that one machine instead of two.
How many hats? A few: the SE700. Batches: the SE2000 or PE800, for the field to lay out several patches and, on the SE2000, a published speed to plan around.